# 常见模式
有许多常见的用户界面模式可以使用Qt Quick Controls来实现。 在本节中,尝试演示如何构建其中一些更常见的。
# 嵌套屏幕
在这个例子中,将创建一个可以从上一级屏幕访问的页面树, 结构如下图所示。

这种类型的用户界面中的关键组件是StackView(堆栈视图)。 它允许将页面放在一个堆栈上,然后当用户想要返回时可以将其弹出。 在这里的示例中,将展示如何实现这一点。
应用程序的初始主屏幕如下图所示。
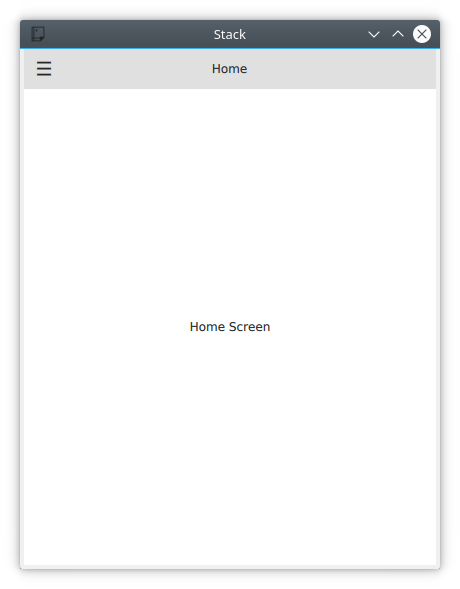
应用程序从main.qml 开始,其中有一个包含ToolBar、Drawer、StackView和主页元素Home的ApplicationWindow。 下面将分析每个组件。
import QtQuick
import QtQuick.Controls

ApplicationWindow {

    // ...

    header: ToolBar {

        // ...

    }

    Drawer {

        // ...

    }

    StackView {
        id: stackView
        anchors.fill: parent
        initialItem: Home {}
    }
}
主页Home.qml由一个Page组成,它是支持页眉和页脚的n个控制元素。 在这个例子中,只是在页面上将带有文本Home Screen的Label居中。 这是有效的,因为StackView的内容会自动填充堆栈视图,因此页面将具有合适的大小以使其工作。
import QtQuick
import QtQuick.Controls

Page {
    title: qsTr("Home")

    Label {
        anchors.centerIn: parent
        text: qsTr("Home Screen")
    }
}
回到main.qml,现在分析抽屉部分。 这是页面导航的地方。 用户界面的活动部分是ÌtemDelegate项,在onClicked处理器中,下一个要展示的页面被推送到stackView实例。
如下代码所示,可以推送Component或对特定QML文件的引用。 无论哪种方式都会使得创建一个新实例并将其推送到堆栈上。
ApplicationWindow {

    // ...

    Drawer {
        id: drawer
        width: window.width * 0.66
        height: window.height

        Column {
            anchors.fill: parent

            ItemDelegate {
                text: qsTr("Profile")
                width: parent.width
                onClicked: {
                    stackView.push("Profile.qml")
                    drawer.close()
                }
            }
            ItemDelegate {
                text: qsTr("About")
                width: parent.width
                onClicked: {
                    stackView.push(aboutPage)
                    drawer.close()
                }
            }
        }
    }

    // ...

    Component {
        id: aboutPage

        About {}
    }

    // ...

}
重要设计的另一半是工具栏。 这个想法是当stackView包含多个页面时显示一个后退按钮,否则显示一个菜单按钮。 这个逻辑可以在text属性中看到,其中"\\u..." 字符串代表所需按钮的unicode符号。
在onClicked处理器中,可以看到,当堆栈中的页面超过一页时,堆栈被弹出,即顶部页面被移除;如果堆栈仅包含一项,即主屏幕,则打开抽屉页面。
在ToolBar下方,有一个Label,此元素在页眉的中心显示每个页面的标题。
ApplicationWindow {

    // ...

    header: ToolBar {
        contentHeight: toolButton.implicitHeight

        ToolButton {
            id: toolButton
            text: stackView.depth > 1 ? "\u25C0" : "\u2630"
            font.pixelSize: Qt.application.font.pixelSize * 1.6
            onClicked: {
                if (stackView.depth > 1) {
                    stackView.pop()
                } else {
                    drawer.open()
                }
            }
        }

        Label {
            text: stackView.currentItem.title
            anchors.centerIn: parent
        }
    }

    // ...

}
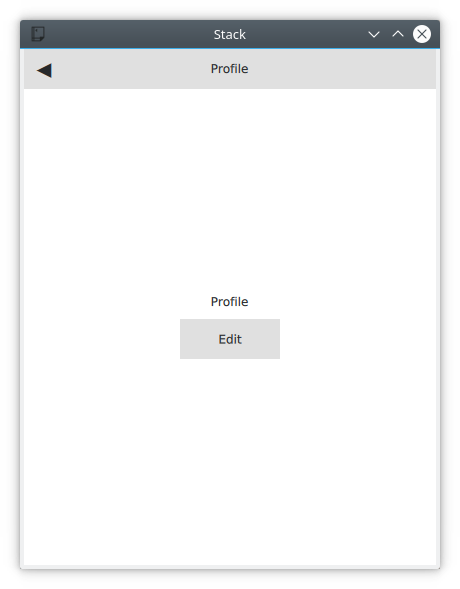
现在已经了解了如何访问About(关于)和Profile(配置)页面,但还希望能够从Profile(个人资料)页面访问Edit Profile(编辑个人资料)页面。 这通过Profile页面上的Button打开,单击按钮时,EditProfile.qml文件被压到StackView上。
import QtQuick
import QtQuick.Controls

Page {
    title: qsTr("Profile")

    Column {
        anchors.centerIn: parent
        spacing: 10
        Label {
            anchors.horizontalCenter: parent.horizontalCenter
            text: qsTr("Profile")
        }
        Button {
            anchors.horizontalCenter: parent.horizontalCenter
            text: qsTr("Edit");
            onClicked: stackView.push("EditProfile.qml")
        }
    }
}
# 并列屏幕
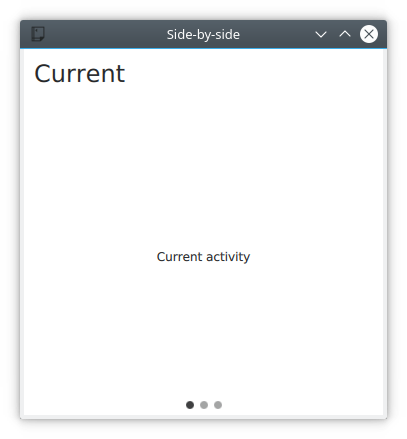
对于此示例,创建了一个用户界面,该界面由用户可以切换的三个页面组成。 页面如下图所示。 这可以是健康追踪应用的界面,追踪当前状态、用户的统计和社区整体统计。

下图显示了Current(当前)页面在应用程序中的外观。 屏幕的主要部分由SwipeView(滑动视图)管理,它支持并排屏幕交互模式。 图中的标题和文字来自SwipeView内部的页面,而PageIndicator(底部的三个点)来自main.qml,位于SwipeView之下。 页面指示器向用户显示当前处于活动状态的页面,这有助于导航。
进一步了解main.qml,它由一个带有SwipeView的ApplicationWindow组成。
import QtQuick
import QtQuick.Controls

ApplicationWindow {
    visible: true
    width: 640
    height: 480

    title: qsTr("Side-by-side")

    SwipeView {

        // ...

    }

    // ...

}
在SwipeView中,每个子页面都按照它们出现的顺序进行实例化,这些子页面分别是Current(当前)、UserStats(用户统计)和TotalStats(全部信息统计)。
ApplicationWindow {

    // ...

    SwipeView {
        id: swipeView
        anchors.fill: parent

        Current {
        }

        UserStats {
        }

        TotalStats {
        }
    }

    // ...

}
最后,将SwipeView(滑动视图)的count(数量)和currentIndex(当前索引)属性绑定到PageIndicator(页面指示器)元素。 这样就完成了这些页面的周围结构。
ApplicationWindow {

    // ...

    SwipeView {
        id: swipeView

        // ...

    }

    PageIndicator {
        anchors.bottom: parent.bottom
        anchors.horizontalCenter: parent.horizontalCenter

        currentIndex: swipeView.currentIndex
        count: swipeView.count
    }
}
每个页面由一个Page组成,这个Page由一个header和一些内容组成,这个header又包含Label。 对于Current和User Stats 页面,内容包括一个简单的Label;但对于 Community Stats页面,包含一个后退按钮。
import QtQuick
import QtQuick.Controls

Page {
    header: Label {
        text: qsTr("Community Stats")
        font.pixelSize: Qt.application.font.pixelSize * 2
        padding: 10
    }

    // ...

}
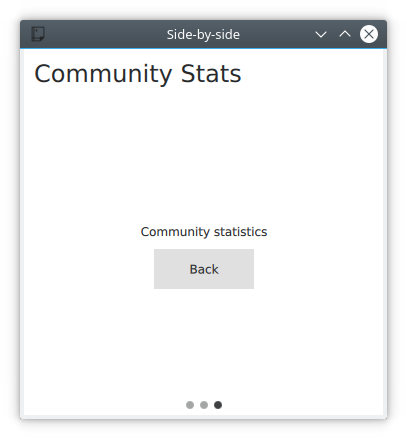
后退按钮显式调用SwipeView的setCurrentIndex函数将索引设置为零,使用户直接返回到Current页面。 在页面之间的每次切换期间,SwipeView提供了一个过渡,因此即使在显式更改索引时,用户也会获得感到页面运动的方向。
提示
当以编程的方式在SwipeView中导航时,重要的是不要通过JavaScript中的赋值来设置currentIndex,因为这样做会覆盖并破坏任何的QML绑定。 而是使用方法setCurrentIndex、incrementCurrentIndex和decrementCurrentIndex则会保留QML的绑定。
Page {

    // ...

    Column {
        anchors.centerIn: parent
        spacing: 10
        Label {
            anchors.horizontalCenter: parent.horizontalCenter
            text: qsTr("Community statistics")
        }
        Button {
            anchors.horizontalCenter: parent.horizontalCenter
            text: qsTr("Back")
            onClicked: swipeView.setCurrentIndex(0);
        }
    }
}
# 文档窗口
此示例展示了如何实现面向桌面、以文档为中心的用户界面。 这个想法是每个文档都有一个窗口。 每打开一个新文档时,都会打开一个新窗口。 对于用户来说,每个窗口都是一个自包含的单个文档。
代码从带有File(文件)菜单的ApplicationWindow开始,其中包含标准操作:New(新建)、Open(文件)、Save(保存)和Save As(另存为),把它放在DocumentWindow.qml中。
为原生对话框导入了Qt.labs.platform,并对项目文件和main.cpp进行了后续更改,如上面有关原生对话框的部分所述。
import QtQuick
import QtQuick.Controls
import Qt.labs.platform as NativeDialogs

ApplicationWindow {
    id: root

    // ...

    menuBar: MenuBar {
        Menu {
            title: qsTr("&File")
            MenuItem {
                text: qsTr("&New")
                icon.name: "document-new"
                onTriggered: root.newDocument()
            }
            MenuSeparator {}
            MenuItem {
                text: qsTr("&Open")
                icon.name: "document-open"
                onTriggered: openDocument()
            }
            MenuItem {
                text: qsTr("&Save")
                icon.name: "document-save"
                onTriggered: saveDocument()
            }
            MenuItem {
                text: qsTr("Save &As...")
                icon.name: "document-save-as"
                onTriggered: saveAsDocument()
            }
        }
    }

    // ...

}
为了引导程序,从main.qml中创建第一个DocumentWindow实例,它是应用程序的入口点。
import QtQuick

DocumentWindow {
    visible: true
}
在本章开头的例子中,每个MenuItem在触发时都会调用一个对应的函数。 从调用newDocument函数的New项开始。
反过来,该函数依赖于createNewDocument函数,该函数根据DocumentWindow.qml文件动态创建一个新的元素实例,即一个新的DocumentWindow实例。 把这部分新功能取出来的原因是在打开文档的时候也用到了。
请注意,在使用createObject创建新实例时,没有提供其父元素,这样就创建了新的顶级元素。 如果将当前文档作为下一个文档的父窗口,父窗口的销毁将导致子窗口的销毁。
ApplicationWindow {

    // ...

    function createNewDocument()
    {
        var component = Qt.createComponent("DocumentWindow.qml");
        var window = component.createObject();
        return window;
    }

    function newDocument()
    {
        var window = createNewDocument();
        window.show();
    }

    // ...

}
查看Open项,看到它调用了openDocument函数。 该函数只是打开openDialog,让用户选择要打开的文件。 由于没有设置文档格式、文件扩展名或类似的东西,对话框的大多数属性都为默认值。 在真实的应用程序中,需要更好的配置这些。
在onAccepted处理器中,使用createNewDocument方法实例化一个新文档窗口,并在显示窗口之前设置文件名。 在目前的情况下,文档不会发生真正的加载(这里并没有实现这个逻辑)。
提示
将Qt.labs.platform模块导入为NativeDialogs。 这是因为它提供了一个与QtQuick.Controls模块提供的MenuItem相冲突的MenuItem。
ApplicationWindow {

    // ...

    function openDocument(fileName)
    {
        openDialog.open();
    }

    NativeDialogs.FileDialog {
        id: openDialog
        title: "Open"
        folder: NativeDialogs.StandardPaths.writableLocation(NativeDialogs.StandardPaths.DocumentsLocation)
        onAccepted: {
            var window = root.createNewDocument();
            window.fileName = openDialog.file;
            window.show();
        }
    }

    // ...

}
文件名使用描述文档的一对属性表示:fileName和isDirty,fileName持有文档的文件名,当文档存在未保存的更改时设置isDirty。 这是由保存(save)和另存为(save as)逻辑使用,如下所示。
当尝试保存没有名称的文档时,会调用saveAsDocument函数,这会导致往返式调用saveAsDialog,它设置一个文件名,然后尝试在onAccepted处理器中再次调用保存。
请注意,saveAsDocument和saveDocument函数对应于Save As和Save菜单项。
保存文档后,在saveDocument函数中,会检查tryingToClose属性。 如果是用户想要在关闭窗口时保存文档的结果,则设置此标志。 因此,在执行保存操作后关闭窗口。 同样,在这个例子中没有发生实际的保存。
ApplicationWindow {

    // ...

    property bool isDirty: true        // Has the document got unsaved changes?
    property string fileName           // The filename of the document
    property bool tryingToClose: false // Is the window trying to close (but needs a file name first)?

    // ...

    function saveAsDocument()
    {
        saveAsDialog.open();
    }

    function saveDocument()
    {
        if (fileName.length === 0)
        {
            root.saveAsDocument();
        }
        else
        {
            // Save document here
            console.log("Saving document")
            root.isDirty = false;

            if (root.tryingToClose)
                root.close();
        }
    }

    NativeDialogs.FileDialog {
        id: saveAsDialog
        title: "Save As"
        folder: NativeDialogs.StandardPaths.writableLocation(NativeDialogs.StandardPaths.DocumentsLocation)
        onAccepted: {
            root.fileName = saveAsDialog.file
            saveDocument();
        }
        onRejected: {
            root.tryingToClose = false;
        }
    }

    // ...

}
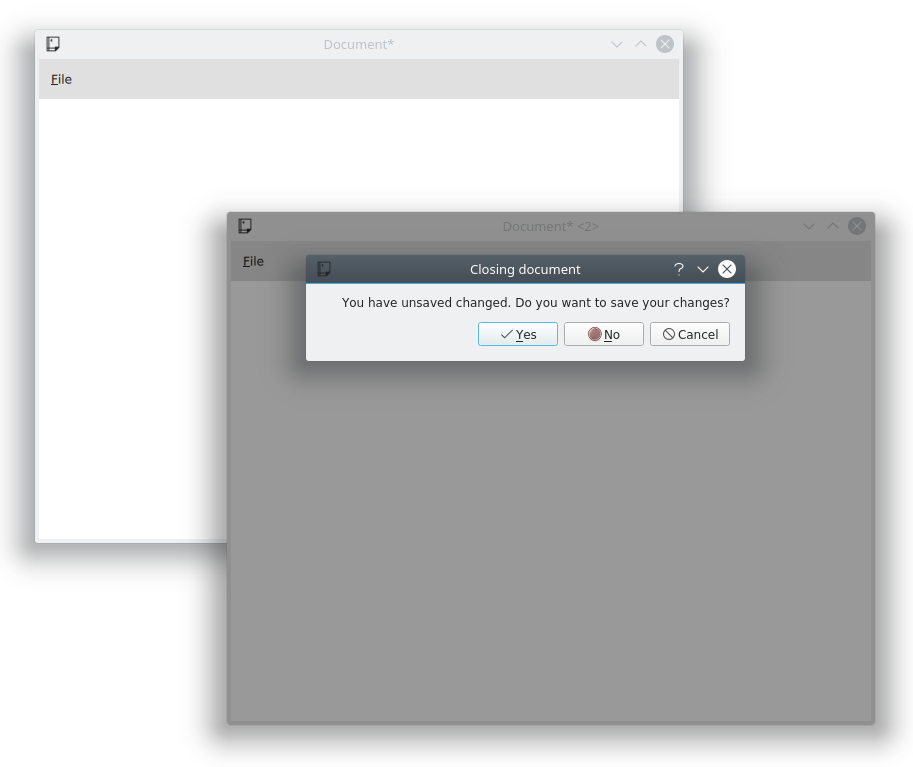
下面的内容引导了解关闭窗口的处理。 当一个窗口被关闭时,onClosing处理器被调用。 在这里,代码可以选择不接受关闭请求。 如果文档有未保存的更改,打开closeWarningDialog对话框并拒绝关闭请求。
closeWarningDialog询问用户是否应该保存更改,但用户也可以选择取消关闭操作。 在onRejected中处理的取消,这是最简单的情况,因为在打开对话框时已经拒绝了关闭。
当用户不想保存更改时,即在onNoClicked中,将isDirty标志设置为false并再次关闭窗口。 在这一次,由于isDirty是false,onClosing将接受关闭。
最后,当用户想要保存更改时,在调用save之前将tryingToClose标志设置为true,这将引向执行保存/另存为逻辑。
ApplicationWindow {

    // ...

    onClosing: {
        if (root.isDirty) {
            closeWarningDialog.open();
            close.accepted = false;
        }
    }

    NativeDialogs.MessageDialog {
        id: closeWarningDialog
        title: "Closing document"
        text: "You have unsaved changed. Do you want to save your changes?"
        buttons: NativeDialogs.MessageDialog.Yes | NativeDialogs.MessageDialog.No | NativeDialogs.MessageDialog.Cancel
        onYesClicked: {
            // Attempt to save the document
            root.tryingToClose = true;
            root.saveDocument();
        }
        onNoClicked: {
            // Close the window
            root.isDirty = false;
            root.close()
        }
        onRejected: {
            // Do nothing, aborting the closing of the window
        }
    }
}
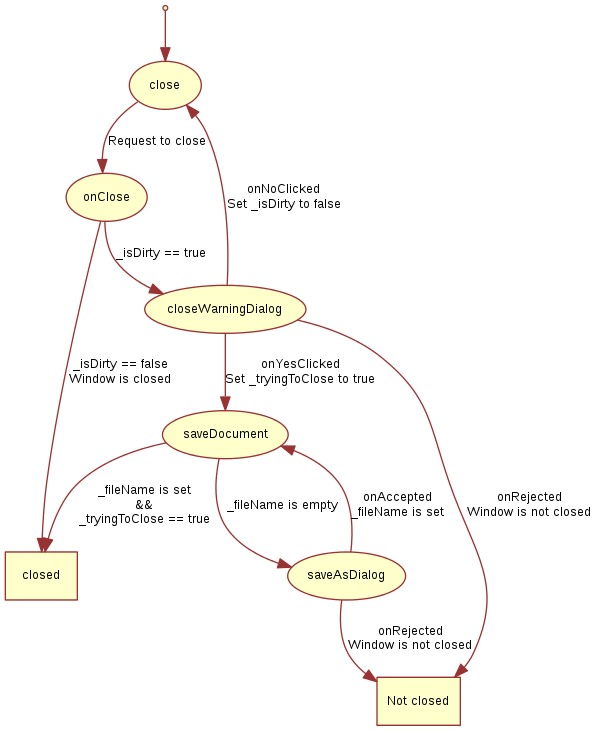
关闭、保存和另存为的整个逻辑流程如下所示。 系统以close状态表示进入关闭流程,而closed 和not closed状态是关闭的结果。
与使用Qt Widget和C++的实现相比,这看起来很复杂。 这是因为对话框不会阻塞QML。 这意味着不能在switch语句中等待对话的结果。 相反,需要记住状态吗,并在相应的onYesClicked、onNoClicked、onAccepted和onRejected处理器中继续后续的操作。
最后的一部分是窗口标题,它由fileName和isDirty属性组成。
ApplicationWindow {

    // ...

    title: (fileName.length===0?qsTr("Document"):fileName) + (isDirty?"*":"")

    // ...

}
这个例子还远未完成。 例如,文档永远不会加载或保存。 另一个缺失的部分是处理一次性关闭所有窗口的情况,即退出应用程序。 对于此功能,需要一个单例类持有所有当前DocumentWindow实例列表。 然而,这只是触发关闭窗口的另一种方式,因此此处的显示逻辑流程仍然有效。